Trong bài này chúng ta sẽ học cách sử dụng ESP32 FOTA để nạp firmware từ xa cho thiết bị của mình. Đây là một quy trình không thể thiếu cho các sản phẩm IOT hiện nay bởi tính tiện dụng của nó
Bài 8 Wifi trong Serie Học ESP32 từ A tới Z
FOTA là gì?
FOTA (Firmware Over The Air) là thuật ngữ chỉ việc nạp firmware từ xa mà không cần sử dụng mạch nạp, chỉ cần có 1 kết nối không dây là có thể sử dụng được. FOTA được sử dụng rộng rãi trong các sản phẩm IOT.
Các bạn đã từng cập nhật hệ điều hành điện thoại hay chưa? Đó chính là FOTA đó. Hệ điều hành sẽ được cập nhật thông qua internet, điện thoại sau khi cập nhật xong sẽ restart và chạy hệ điều hành mới.

Tại sao chúng ta phải sử dụng FOTA
FOTA đem lại rất nhiều lợi ích khi lập trình IOT
- Giúp việc nạp firmware trong quá trình R&D dễ dàng hơn, bởi nhiều khi sản phẩm IOT bị đóng kín, không có các chân để giao tiếp với bên ngoài mà chỉ giao tiếp qua các chuẩn không dây
- Thuận tiện trong việc bảo trì, nâng cấp firmware.
- Cập nhật các tính năng mới của sản phẩm và app
Tuy nhiên khi FOTA chúng ta sẽ gặp những vấn đề sau:
- Tốn bộ nhớ khi sử dụng
- Cần bảo mật các giao thức nạp hoặc sử dụng user dành riêng cho việc nạp
Lập trình ESP32 FOTA nạp firmware từ xa trong mạng local wifi
Trong bài này chúng ta sử dụng ESP32 FOTA, nạp chương trình blynk led bằng wifi cho ESP32, sử dụng webserver được tạo ra bởi ESP32.

Thiết lập trên server ESP32
Thiết lập style, màu sắc của web page

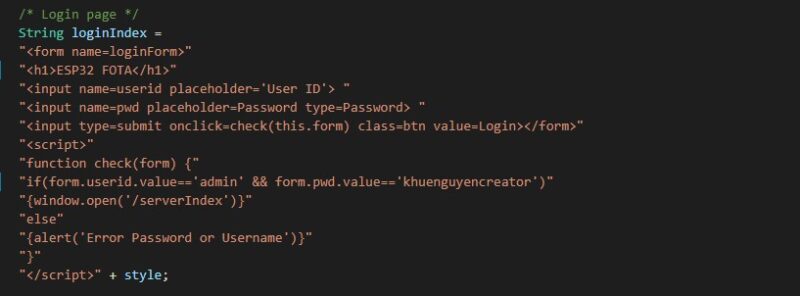
Thiết lập giao diện login
Để đổi tài khoản và mật khẩu login các bạn sửa câu lệnh: "if(form.userid.value=='admin' && form.pwd.value=='khuenguyencreator')"
Trong bài này ta sử dụng:
- ID: admin
- Password: khuenguyencreator
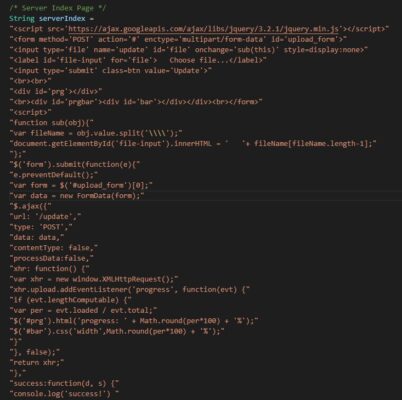
Thiết lập giao diện upload
Cập nhập firmware trên ESP32
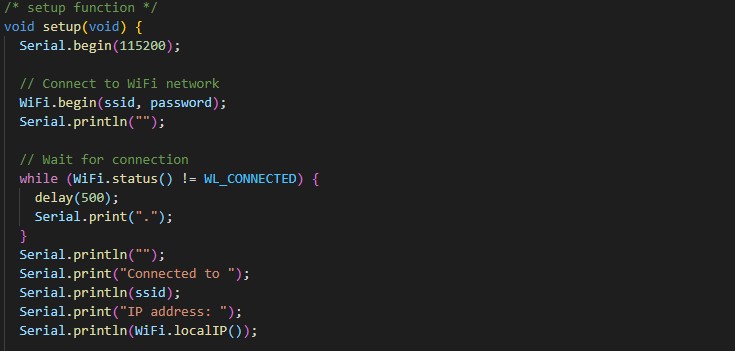
Kết nối với wifi, quá quen thuộc với bạn rồi.
Sử dụng mDNS để truy cập đơn giản hơn, không cần sử dụng ip

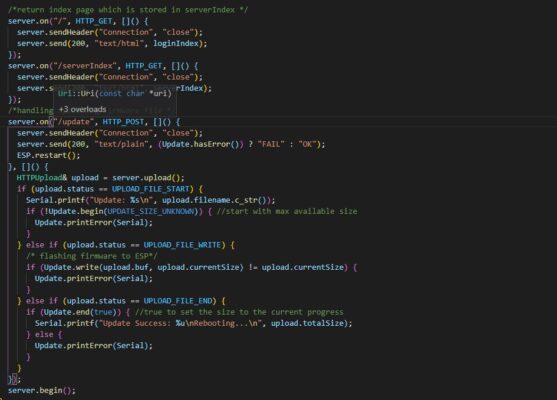
Nạp firmware với file upload lên. Phần này chúng ta sẽ thêm các cách xử lý cho ESP32 mỗi event sảy ra
- Event khi vào trang login
- Event khi đăng nhập, vào trang upload
- Event khi upload firmware và nạp vào esp32
Để nạp firmware vào ESP32 ta sử dụng thư viện Update, với các hàm Update.begin , Update.buf , Update.end
Trong loop chúng ta bật hàm xử lý các event. Và delay 1ms.
Full code
#include <Arduino.h>
#include <WiFi.h>
#include <WiFiClient.h>
#include <WebServer.h>
#include <ESPmDNS.h>
#include <Update.h>

const char* host = "esp32";
const char* ssid = "hellovtag";
const char* password = "12345678";

WebServer server(80);

/* Style */
String style =
"<style>#file-input,input{width:100%;height:44px;border-radius:4px;margin:10px auto;font-size:15px}"
"input{background:#f1f1f1;border:0;padding:0 15px}body{background:#3498db;font-family:sans-serif;font-size:14px;color:#777}"
"#file-input{padding:0;border:1px solid #ddd;line-height:44px;text-align:left;display:block;cursor:pointer}"
"#bar,#prgbar{background-color:#f1f1f1;border-radius:10px}#bar{background-color:#3498db;width:0%;height:10px}"
"form{background:#fff;max-width:258px;margin:75px auto;padding:30px;border-radius:5px;text-align:center}"
".btn{background:#3498db;color:#fff;cursor:pointer}</style>";

/* Login page */
String loginIndex =
"<form name=loginForm>"
"<h1>ESP32 FOTA</h1>"
"<input name=userid placeholder="User ID"> "
"<input name=pwd placeholder=Password type=Password> "
"<input type=submit onclick=check(this.form) class=btn value=Login></form>"
"<script>"
"function check(form) {"
"if(form.userid.value=='admin' && form.pwd.value=='khuenguyencreator')"
"{window.open('/serverIndex')}"
"else"
"{alert('Error Password or Username')}"
"}"
"</script>" + style;

/* Server Index Page */
String serverIndex =
"<script src="https://ajax.googleapis.com/ajax/libs/jquery/3.2.1/jquery.min.js"></script>"
"<form method='POST' action="https://khuenguyencreator.com/lap-trinh-esp32-fota-nap-firmware-tu-xa-bang-local-wifi/#" enctype="multipart/form-data" id='upload_form'>"
"<input type="file" name="update" id='file' onchange="sub(this)" style=display:none>"
"<label id='file-input' for="file">   Choose file...</label>"
"<input type="submit" class=btn value="Update">"
"<br><br>"
"<div id='prg'></div>"
"<br><div id='prgbar'><div id='bar'></div></div><br></form>"
"<script>"
"function sub(obj){"
"var fileName = obj.value.split('\\');"
"document.getElementById('file-input').innerHTML = '   '+ fileName[fileName.length-1];"
"};"
"$('form').submit(function(e){"
"e.preventDefault();"
"var form = $('#upload_form')[0];"
"var data = new FormData(form);"
"$.ajax({"
"url: '/update',"
"type: 'POST',"
"data: data,"
"contentType: false,"
"processData:false,"
"xhr: function() {"
"var xhr = new window.XMLHttpRequest();"
"xhr.upload.addEventListener('progress', function(evt) {"
"if (evt.lengthComputable) {"
"var per = evt.loaded / evt.total;"
"$('#prg').html('progress: ' + Math.round(per*100) + '%');"
"$('#bar').css('width',Math.round(per*100) + '%');"
"}"
"}, false);"
"return xhr;"
"},"
"success:function(d, s) {"
"console.log('success!') "
"},"
"error: function (a, b, c) {"
"}"
"});"
"});"
"</script>" + style;

/* setup function */
void setup(void) {
  Serial.begin(115200);

  // Connect to WiFi network
  WiFi.begin(ssid, password);
  Serial.println("");

  // Wait for connection
  while (WiFi.status() != WL_CONNECTED) {
    delay(500);
    Serial.print(".");
  }
  Serial.println("");
  Serial.print("Connected to ");
  Serial.println(ssid);
  Serial.print("IP address: ");
  Serial.println(WiFi.localIP());

  /*use mdns for host name resolution*/
  if (!MDNS.begin(host)) { //http://esp32
    Serial.println("Error setting up MDNS responder!");
    while (1) {
      delay(1000);
    }
  }
  Serial.println("mDNS responder started");

  /*return index page which is stored in serverIndex */
  server.on("/", HTTP_GET, []() {
    server.sendHeader("Connection", "close");
    server.send(200, "text/html", loginIndex);
  });
  server.on("/serverIndex", HTTP_GET, []() {
    server.sendHeader("Connection", "close");
    server.send(200, "text/html", serverIndex);
  });
  /*handling uploading firmware file */
  server.on("/update", HTTP_POST, []() {
    server.sendHeader("Connection", "close");
    server.send(200, "text/plain", (Update.hasError()) ? "FAIL" : "OK");
    ESP.restart();
  }, []() {
    HTTPUpload& upload = server.upload();
    if (upload.status == UPLOAD_FILE_START) {
      Serial.printf("Update: %sn", upload.filename.c_str());
      if (!Update.begin(UPDATE_SIZE_UNKNOWN)) { //start with max available size
        Update.printError(Serial);
      }
    } else if (upload.status == UPLOAD_FILE_WRITE) {
      /* flashing firmware to ESP*/
      if (Update.write(upload.buf, upload.currentSize) != upload.currentSize) {
        Update.printError(Serial);
      }
    } else if (upload.status == UPLOAD_FILE_END) {
      if (Update.end(true)) { //true to set the size to the current progress
        Serial.printf("Update Success: %unRebooting...n", upload.totalSize);
      } else {
        Update.printError(Serial);
      }
    }
  });
  server.begin();
}

void loop(void) {
  server.handleClient();
  delay(1);
}
Kết quả
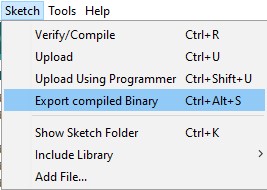
Sau khi nạp code vào ESP32, chung ta sử dụng Arduino, mở example blink led. Tạo bin file như sau:
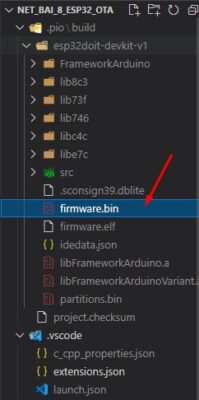
Nếu sử dụng platformio, các bạn nhấn build project, bin file sẽ nằm trong thư mục .pio theo đường dẫn
Để upload firmware, chúng ta mở trình duyệt, vào ip hoặc mDNS của ESP32.
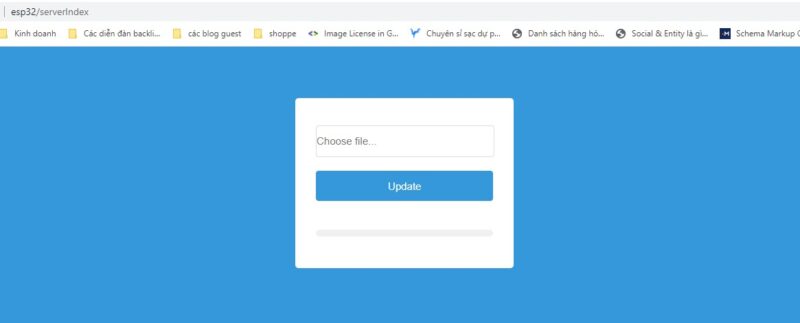
Login vào đúng account đã tạo
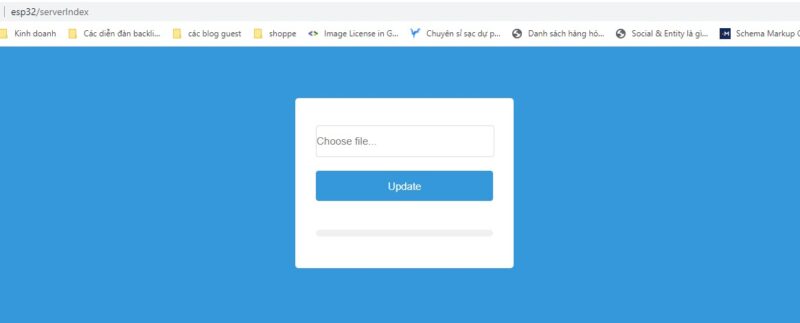
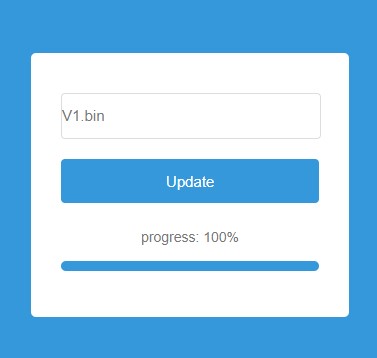
Nhấn update, tìm tới file bin đã tạo ra.

Nhấn update, kết quả ESP32 sẽ reboot và chạy firmware của blink, nháy led liên tục.
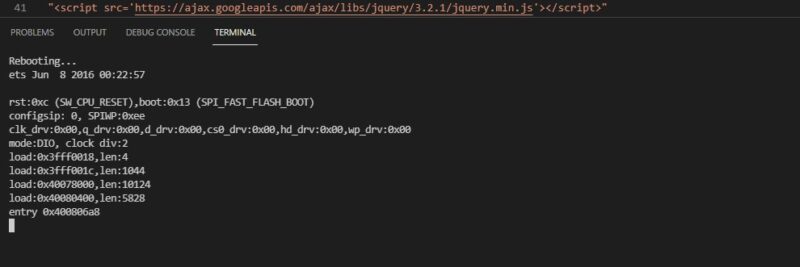
Lưu ý: Vì firmware blink không có fota, vậy nên chúng ta không thể fota cho esp32 sau khi nạp code blink. Để có thể sử dụng fota tiếp thì bắt buộc bản firmware bạn nạp vào cũng cần có chức năng fota
Kết
FOTA là chức năng quan trọng trong lập trình IOT, tuy rằng FOTA sử dụng mạng nội bộ không được sử dụng nhiều trong các sản phẩm thực tế, tuy nhiên chúng vẫn có nhiều ứng dụng. Thông thường firmware sẽ được lưu tại 1 server trên internet và ESP32 sẽ kết nối và download firmware từ đó. Giúp lập trình viên quản lí version dễ dàng hơn, chi tiết chúng ta sẽ học trong bài sau.
Cám ơn các bạn đã đọc bài viết, cùng vào hội Anh Em Nghiện Lập Trình để cùng trao đổi nhé